
Installing a new gas connection in a property that has never had gas can seem daunting, but with the right information it becomes a manageable process. This detailed guide for homeowners in England walks you through everything from paperwork and regulations to the physical installation and safety checks. We’ll cover the permits you might need, the legal codes (like Building Regulations Part J and the Gas Safety (CO alarm rules for properties across the UK – Registered Gas Engineer) to follow, how to get your home connected to the gas network, materials and steps involved in the installation, safety precautions, and tips on choosing a qualified installer. 
A typical gas stove burner flame, one of the common uses of (HSE Gas Safety Leaflet) gas supply. Converting to gas can provide efficient heating and cooking, but it requires careful planning and compliance with regulations.
Permits and Documentation before work begins
Planning Permission and Consent: In most cases you do not need full planning permission just to install a new gas supply pipe or meter at your property. Gas network companies have statutory rights to dig up streets and lay pipes without a specific planning permit. However, if your gas pipe route must cross any third-party land (property that isn’t yours), you must obtain written consent from that landowner before work can proceed.
Additionally, if your house is a listed building or in a conservation area, consult your local authority – adding a meter box or exterior pipe might require listed building consent or special permission in those cases. The responsibility is on you as the homeowner to ensure any required permissions (for crossing private land or altering a protected building) are in place.
Building Control Notification: Installing a new gas supply and appliances is considered “building work”. (A Guide to Gas Appliance Installation and Certificates) In England, you typically don’t need to submit a building control application separately if you hire a registered gas installer, because Gas Safe registered engineers can self-certify their work. When a new heat-producing gas appliance (like a boiler or gas fire) is installed, the installer will notify the Local Authority on your behalf and you’ll receive a Building Regulations Compliance Certificate within a few weeks.
If you were not using a Gas Safe registered installer (which you legally must – see Section 3), you would have to inform the local authority building control before work and possibly pay an inspection fee. In summary, ensure your Gas Safe installer will handle the building regulations notification and provide you with the compliance certificate after installation.
Other Documentation: Before work, you should gather some basic documentation and plans. Gas distribution companies require certain info when you apply for a new connection: the full address of the property, the property owner’s details, and your preferred meter location on the property.
If your home is a new build, you’ll need to show approved planning permission and site plans for the building. It’s wise to sketch out a route for the incoming gas pipe – showing the distance from the property boundary to your desired meter position – as you may need to provide the distance in the application (the gas company can assist with measurements). No specific “permit” is usually needed from the council for digging in your own garden, but if any excavation will encroach on the public pavement or road, the gas network operator will obtain the necessary highway permits under their statutory rights.
Make sure to also check the location of other buried services ( (Gas safety and Building Regulations (compliance certificates) – Registered Gas Engineer) (Gas safety and Building Regulations (compliance certificates) – Registered Gas Engineer)ns) on your property – you may need to show that the new gas trench won’t disturb them (following guidelines like HSE’s HS(G)47 for avoiding underground service damage). Finally, if you live in a leasehold property, obtain the freeholder’s permission as needed, since installing new utility infrastructure could be considered an alteration.
Key Regulations and Codes to Comply With
When installing a gas supply, you must adhere to UK laws and technical standards designed for safety. The two cornerstone regulations are the Building Regulations (especially Approved Document J) and the Gas Safety (Installation and Use) Regulations 1998. Here’s what they entail:
- Building Regulations Part J (Combustion Appliances and Fuel Storage): Part J of the building code ensures any new gas appliance or flue is installed safely and won’t create fire or carbon monoxide risks. Approved Document J covers the proper installation of boilers, fireplaces, flues, chimneys, and fuel storage systems, and includes requirements to control fire hazards and prevent pollution or carbon monoxide poisoning.
In practical terms, this means if you’re installing (Order Replacement Building Regulations Certificate) an oiler or heater you must provide adequate ventilation, use the correct flue/chimney design, and follow clearance distances from combustibles as specified in Part J. As of 2022, Part J also mandates carbon monoxide alarms in any room where a new or replacement fixed combustion appliance is fitted (except for gas cookers). So if you add a gas boiler or gas fire during your installation, you are legally required to put a CO alarm in that room to warn occupants of any CO leaks. The updated rules took effect on 1 October 2022 in England. Ensure your installer is familiar with Part J and provides a CO detector – it’s a simple but vital compliance step. - Gas Safety (Installation and Use) Regulations 1998 (GSIUR): These are the national gas safety laws covering how gas pipes and appliances must be installed and used. One of the fundamental rules is that only a competent, registered engineer can carry out gas work. By law, anyone doing gas installation as a business must be registered with the official Gas Safe Register. This is non-negotiable – DIY gas work or using an unregistered tradesperson is illegal and dangerous.
The Gas Safety regulations also require that when a new supply is installed, it must include an emergency control valve at the point of entry (usually this is the main shut-off lever by your meter) so the gas can be cut off quickly in an emergency. The materials and workmanship must meet strict standards – for instance, plastic (PE) gas pipes are not allowed indoors unless properly sleeved in a gas-tight metal conduit. Any new pipework must be strong, sound, and properly tested for leaks before being put into use. Gas appliances must be installed per manufacturer instructions and relevant British Standards (such as BS 5440 for flues, BS 6891 for pipework, etc.).
In summary, GSIUR and associated codes ensure the technical safety of your installation – your Gas Safe engineer will know these in detail, but as a homeowner you should be aware that compliance with these regulations is mandatory for your project.
Other Relevant Standards: In addition to Part J and GSIUR, there are other parts of the Building Regulations and industry standards that might apply. For example, Building Regulations Part B (fire safety) requires that any pipes that pass through walls or floors are sealed to prevent fire spread – your installer might need to fire-stopping where the gas pipe penetrates structures. If a new boiler is installed, Building Regulations Part L (energy efficiency) will apply – modern condensing boilers and controls are required to meet efficiency standards.
Also note that your home’s electrical bonding must be up to scratch: the IET Wiring Regulations require that the gas pipe is connected to your electrical earthing system with the correct bonding clamp and cable (typically 10mm² green/yellow wire) as a safety measure to prevent shocks. A good Gas Safe engineer or electrician will check and install bonding if needed during the gas supply installation.
In summary, there is a web of codes ensuring that when you get gas, it’s done safely and efficiently. Be sure to use professionals who will adhere to: Part J (and others) of Building Regulations, Gas Safety 1998 law, and all relevant technical standards. Non-compliance can lead to serious hazards and even legal action by the local authority (they can require you to fix or remove improper work, or prosecute in serious cases). 
Applying to Your Gas Network Operator for a New Connection
The first major step is to get your property physically connected to the gas grid. In the UK, gas distribution is handled by regional Gas Distribution Networks (GDNs) such as Cadent, Northern Gas Networks, SGN, and Wales & West Utilities. You’ll need to contact your local GDN to request a new gas service pipe to your home. You can find out which network operator covers your area via the Energy Networks Association website or by asking the National Gas helpline. Here’s the typical process:
- Contact and Quote: Reach out to the GDN – most have an online application form or a phone number for new connections.
For example, Cadent (which covers a large part of England) allows you to apply online for a quote. You’ll provide details like your address, desired meter location, and boundary (Get your home connected to a gas or electricity supply – Citizens Advice). The network will then assess the nearest gas main and design the service route. They will provide a quote for the connection cost (Microsoft Word – Consent Guide National Grid v3.doc). The cost depends on how much work and digging is needed – typically, if your house is within 23 meters of the gas main, it falls under a standard connection ( (Approved Document J – Designing Buildings) ~£100 to ~£1000), whereas longer distances or complex routes cost more. The quote will often be broken down into work the GDN must do and will offer the option to arrange it yourself – like digging your own trench on your property. (CO alarm rules for properties across the UK – Registered Gas Engineer) You usually have up to 3 months to accept the quote and pay before it expires. - Installation and Site Visit: ([PDF] Safety in the installation and use of gas systems and appliances) After you accept and pay, the GDN will schedule a site survey. An engineer may visit you (Gas Safe Register – HSE) to confirm the proposed meter location and route. (HSE Gas Safety Leaflet) Make sure the path from the street to your meter position is clear and decide where the meter box will go, typically on an exterior wall of the house (New Gas Connection – Cadent Gas Ltd). The surveyor will also discuss if you’ll do any digging yourself. You’ll then get a planned date for the excavation. (22395 Excavation guidance sheet v4.cdr) (Could you be entitled to help with paying for your new gas connection) They often take about 6–8 weeks from payment to completion, as the utility must arrange permits and crew.
- Installing Pipe (A Guide to Gas Appliance Installation and Certificates): The GDN’s contractors will excavate a trench from the road (or gas main location) to your house. They will tap into the gas main and run a new service pipe (HSE Gas Safety Leaflet)to the property.
Modern service pipes are usually yellow polyethylene (PE) for underground sections, which are durable and corrosion-resistant. The trench depth on private land is typically around 450 mm (about 18 inches) to the top of the pipe, with a minimum of 375 mm cover required even in gardens. The gas pipe must be laid with a certain clearance (at least 250 mm) from other utilities like water or electric cables.
If you choose to dig the trench yourself to save money, follow the guidelines provided by the GDN: for example, Wales & West Utilities advises a 500 mm deep trench, 250–300 mm wide, with soft sand or fine fill at the bottom and no sharp stones that could damage the pipe. The GDN will then lay the PE pipe in your trench (or they may push a pipe underground in some cases to minimize digging).
When the pipe reaches your house, it will terminate at the agreed meter position. The installer will fit an Emergency Control Valve (ECV) as the shutoff point, and likely a meter mounting bracket or box if not already in place. They also add a regulator (to step down the pressure) upstream of the meter. By law, the service pipe must terminate as near as practical to the entry point – usually the meter is just inside or directly outside where the pipe reaches your house.
Once all in place, the trench is backfilled and surfaces are restored (the gas company will usually refill holes they dug; you are responsible for final reinstatement on your land if you dug it yourself). - Meter Installation: The gas meter itself is not installed by the distribution network; it’s provided by your chosen gas supplier (the company you’ll pay for gas, like British Gas, E.ON, etc.). After the service line is in, the GDN will issue your property a Meter Point Reference Number (MPRN). You then contact a gas supplier of your choice, give them the MPRN, and request a new meter installation and to start a supply contract. Suppliers are obliged to set up a new connection when asked, so shop around for a good tariff and arrange an account before the connection date to avoid delay. The supplier (or their appointed metering company) will come to fit the meter to the pipework. Usually this is a simple job if the service and ECV are ready – they’ll attach the meter to the inlet pipe and connect your internal outlet pipe. The meter will be sealed and logged into the national database. After this, gas is now available up to your meter.
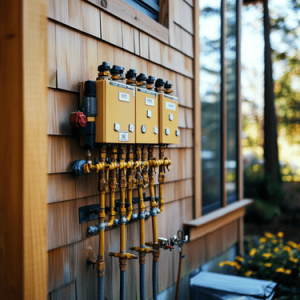
Example of a residential gas meter installation (in this case surface-mounted on an exterior wall). The circular device on the left is the pressure regulator, and the vertical pipe with a handle is the emergency control valve (ECV) for shutting off the gas. Gas network companies own the pipe up to the ECV, while the meter is owned by your energy supplier, and everything after the meter (to appliances) is the homeowner’s responsibility. 
- Internal Supply Pipework: Running a new gas service to your house is only part of the job – you also need internal distribution pipes to whatever appliances you plan to use (boiler, stove, etc.). This portion must be done by a Gas Safe registered engineer (not the network company). You may arrange for your own gas installer to be on site when the meter is fitted, or shortly thereafter, to connect the meter outlet to your home’s gas piping. We cover the internal installation steps in Section 5 below.
- Keep in mind the division of responsibility: the GDN looks after the pipe up to and including the ECV (main shutoff valve) ,the supplier owns the meter itself, and you as homeowner (with your engineer) are responsible for all pipework after the meter leading to appliances. Any work beyond the meter must follow gas safety rules and be tested thoroughly before use.
Materials Used in New Gas Installations
It helps to know what materials and components will be installed as part of your new gas supply, so you can verify quality and compliance:
- Service Pipe: As mentioned, the external underground service is usually medium-density polyethylene (PE) pipe (colored yellow for gas). PE pipe is flexible and comes in coils; it has heat-fused joints or mechanical couplings. PE is only used underground or up to the building entry – it must not be exposed inside the building unless in a gas-tight sleeve.
Where the service enters the house or meter box, it typically transitions to steel or copper via a connector. You might see a steel riser coming up out of the ground into the meter – this steel section protects the plastic pipe and meets the requirement that no plastic is unsheathed indoors. - Meter and Regulator: The gas meter itself in domestic properties is usually a diaphragm type meter (measures volume of gas). In new installations in England, a metric meter (measuring in cubic meters) is standard. Along with the meter, a pressure regulator is installed on the inlet side – this reduces the incoming network pressure (which may be medium pressure in the street) down to the standard 21 mbar delivery pressure for your appliances. The regulator is often a round metal component just before the meter. The Emergency Control Valve (ECV) is normally right before the meter as well – this is a lever or handle you turn to shut off gas in an emergency. By law, it must be easily accessible and simple to operate.
In new builds or installations, the meter and these fittings are often housed in a white plastic meter box on an exterior wall. The meter box can be surface-mounted or built into the wall; in either case, it protects the equipment and allows access for meter reading without entering your home. Make sure the meter box location you choose is not obstructed and is ventilated (meter boxes have vents). Tip: If the meter is external, consider security – modern meter boxes have locks or triangular plastic keys to prevent tampering. - Internal Pipework: After the meter, your internal gas distribution pipes will typically be copper tubing (the standard material for domestic gas pipes). Copper is used because it is durable, familiar to installers, and has low friction for gas flow. Steel pipes (usually black iron) might be used for larger installations or if the pipe needs to be very robust (e.g. exposed runs in commercial settings), but for a home, copper is the norm. The pipes may be jointed by soldering or compression fittings. All joints must be tested for leaks.
If any section of pipe will be concealed (buried in a wall or under a floor), regulations require either no join in that concealed section or the joints must be accessible via an access panel, or the pipe must be in a ventilated duct. This is to avoid hidden leaks. Where pipes pass through walls or floors, they should be sleeved (with a slightly larger pipe around them) and sealed at the ends to prevent gas tracking through building cavities. Pipes run outdoors (to, say, an exterior boiler) should be metal (copper or steel) and securely clipped, and painted or protected from corrosion if steel. - Valves and Fittings: Your installer will put in appropriate isolation valves on the internal pipework—for example, a gas cooker connector will have a shutoff valve, and the boiler will have its own service valve. These allow appliances to be disconnected without shutting off the main supply. All valves and fittings must be rated for gas use. Common fittings like elbows, tees, and unions will be brass or copper. PTFE tape used on threaded gas joints must be a special type for gas (yellow PTFE tape) to ensure a seal. No part of the system should be made of materials that aren’t approved for gas: for instance, no cast iron or lead pipes (those are antiquated and not permitted for new work), and no ordinary water plumbing fittings that aren’t gas-certified.
- Appliances and Flues: Although not “materials” of the supply itself, it’s worth noting: if you’re installing appliances like a boiler, gas fire, or water heater as part of converting to gas, those appliances must be of an approved type (CE/UKCA marked, etc.) and have the correct flue system. Building Regs Part J will govern the material (often twin-wall stainless steel or concentric flue pipes for boilers) and placement (e.g., how far the flue terminal must be from windows or vents). Also, any new boiler must meet efficiency standards (typically a condensing boiler unless exempt) as per building regulations. Ensure your installer provides the appliance manuals and benchmarks – they will be needed for commissioning and future servicing.
In summary, expect yellow plastic pipe underground, steel or copper at entry, a meter + regulator + shutoff valve assembly, and copper pipes indoors. All should be to British Standards and installed by a qualified professional. Don’t hesitate to ask your installer about the materials they are using – for example, confirm that any underground PE pipe is appropriately routed and sleeved at entry, and that internal copper pipes are sized correctly for the gas load (a large boiler and cooker might need a 22mm main pipe reducing to 15mm branches, for instance). Using proper materials is critical for both safety and performance (undersized pipes can lead to poor appliance performance due to pressure drop).
Step-by-Step Installation Process
Now let’s put it all together – from breaking ground to firing up your new boiler, what are the steps to install a new gas supply? Below is a step-by-step breakdown:
Step 1: Planning the Layout – Before any physical work, plan where the gas line will run and where the meter and appliances will go. Mark the proposed meter position on your wall (typically at about mid-height of a ground floor wall, or inside a cabinet if meter to be internal). Ensure there is a direct path from that point to the street with minimal obstructions (avoid large trees or structures in the way). Plan the route of internal pipes: e.g., from the meter location, perhaps run through the wall into a utility room where the boiler will be, and along the kitchen wall for the cooker.
Check that the meter position meets requirements: regulations say the meter should be as close as possible to where the service enters, and for safety the gas meter shouldn’t be located in sleeping areas, bathrooms, or below ground level. Also decide if you need a meter box – surface-mounted boxes can be installed on existing walls fairly easily (requiring drill holes), whereas a recessed meter box would need a builder to cut a niche in the wall. At this stage, identify other utilities (water mains, sewer, electricity) to avoid interfering with them when digging. The plan you create now will be useful to discuss with the GDN surveyor and your gas installer.
Step 2: Excavation (External) – If you are doing the trench yourself (or if the gas company’s contractors handle it), the next step is excavation. Following the plan, dig the trench from the property boundary (or the tap-in point) to the meter location. Remember the depth guidelines: ~450 mm deep on private property for the gas pipe, unless specified otherwise. If the trench crosses a driveway or area that will be heavily loaded, deeper burial or steel ducting might be needed – your GDN will advise. As you dig, keep soil pile away from the trench edges (for safety) and use cable avoidance tools if available to ensure you don’t hit any live cables or pipes.
Trenching safety: if the trench is open overnight or for extended time, fence it or cover it to prevent accidents (as you are responsible for safety on your property). Once the trench is ready, the gas pipe can be laid in it – usually the GDN crew will actually lay and connect the pipe unless you’re in a self-lay scheme. They may also lay a marker tape or polyethylene warning tape a few inches above the pipe in the trench to signal its presence to anyone digging in the future. After the pipe is in place and connected at both ends (to the main and up to your meter point), the trench is backfilled. The first layer of backfill should be soft sand or fine soil around the pipe (about 75 mm over the pipe) to avoid damage. Then the rest of the trench can be filled and compacted. Any pavements or driveways will be re-instated as agreed (the gas company will typically tarmac patch the pavement or your drive if they dug it).
Step 3: Installing the Meter and Internal Pipe Connection – With the service line in place, the focus shifts to hooking up your home’s internal gas system. The gas supplier’s agent will mount the gas meter. If an external meter box is used, the meter goes inside the box; if internal, they’ll mount it on brackets usually just inside the wall where the service enters. The meter installer connects the inlet to the service pipe (via the ECV and regulator) and the outlet will be left capped or connected to your house pipework if already prepared. At this point, you need your Gas Safe engineer on the job (if they haven’t been already) to install the interior pipes from the meter to your appliances. The engineer will typically run a main supply pipe from the meter to the location of the boiler and to the kitchen for any hobs, etc. They might route pipes through floor voids, in lofts, or along walls as needed. They will cut and join copper pipes to create the network. Each appliance or branch will have a shutoff valve for servicing. If a new boiler is being installed, at this step the engineer will also fit the boiler on the wall and connect the gas supply to it (as well as water pipes, flue, etc.).
Ventilation: If the gas appliances (like a boiler or water heater) require a vent or flue, openings will be made now – e.g., drilling a hole for the flue through an external wall per Part J specs. The engineer will also ensure any required air vents (for older boilers or fires that need room air) are in place.
Step 4: Testing and Commissioning – Before any appliance is fired up, the entire new installation must be leak tested. The Gas Safe engineer will perform a gas tightness test on the system. This involves shutting all appliance valves, attaching a pressure gauge (manometer) to the test point (usually on the meter or regulator), and pressurizing the system slightly above atmospheric pressure to see if it holds steady. If the pressure drops, there’s a leak that must be found and fixed before proceeding. Once the pipework passes the tightness test (meaning no leaks), the engineer will purge any air from the pipes.
Now each appliance is commissioned one by one: for a boiler, this means connecting the power, filling the water system, checking the flue, and then lighting the boiler to adjust it. The engineer will measure the flue gases with a analyzer to ensure clean combustion and verify safety controls. For a cooktop/hob, they will light each burner to ensure proper flame and that the flame failure devices work. Any other gas appliance (fire, heater) gets similar checks per manufacturer instructions. Also, carbon monoxide alarms should be installed now in accordance with the law – e.g., if a gas boiler was put in a kitchen or utility room, a CO alarm must be mounted in that room (on the ceiling or high on a wall, 1–3m from the appliance). The engineer should advise you on alarm placement and test it.
As a final step, the entire system is certified: the installer will fill out a Commissioning Certificate (especially for boilers – a Benchmark certificate in the boiler manual) and, if applicable, register the appliance warranty. The Gas Safe notification to building control is also done at this time by the engineer (for heat-producing appliances). Once complete, you officially have a live, working gas supply in your home!
Step 5: Inspection and Handover – After commissioning, the homeowner (you) should be given a demonstration of how the system works. The engineer will show you where the emergency shut-off valve is (usually next to the meter) and how to turn it off in event of a leak. They’ll also show any appliance-specific safety controls. This is the time to ask questions. Ensure you receive any paperwork: this typically includes the Gas Safe installation certificate or record, the Building Regulations Compliance Certificate (which may arrive by post later, as Gas Safe processes it), and any manufacturer documents for appliances. The local authority may not need to physically inspect the work since a Gas Safe self-certification suffices, but keep all documentation in case they or your insurance ask for proof of compliance.
If any issues are discovered during an official inspection (or by Gas Safe’s random inspections) later, the installer is obligated to fix them to meet standards. As long as you’ve used a qualified engineer, this final step should be smooth. Now you’re ready to enjoy your new gas supply – whether it’s heating your home with a gas boiler or cooking on a new gas stove.
Safety Requirements and Considerations
Working with gas is a serious business – safety must be the top priority throughout the installation and for the lifetime of your gas system. Here we highlight critical safety requirements for the engineers performing the work, and for you as the homeowner:
Use Gas Safe Registered Engineers: This cannot be stressed enough – by law, anyone carrying out gas installation or repair work must be Gas Safe registered. Gas Safe Register is the UK’s official registry of qualified gas engineers, run on behalf of the HSE. Before hiring an installer, ask for their Gas Safe ID card and verify their registration number. The ID card also lists what types of gas work they are qualified to do (e.g., pipework, boilers, cookers, etc.). For instance, an engineer might be licensed for domestic boilers but not for gas fires – you need someone qualified for each appliance type. It’s perfectly acceptable to verify an engineer’s credentials on the Gas Safe Register website or by calling Gas Safe. Never attempt to DIY any part of a gas installation if you are not registered – not only is it illegal, but faulty gas work can lead to gas leaks, fires or explosions, and carbon monoxide poisoning. The Health and Safety Executive (HSE) actively enforces gas safety laws, and improper work can result in prosecution.
Always check the Gas Safe Register ID card of any engineer working on your gas installation. By law, gas engineers must be Gas Safe registered and carry an ID card like the one shown, which confirms their identity and qualifications. Do not let anyone work on your gas supply without verifying this.
Safe Working Practices: Professional gas engineers follow strict safety protocols during installation. This includes isolating gas supplies when working (the ECV should be off until testing is done), using personal gas detectors when necessary, and ventilating work areas. No open flames or sparking tools are used near gas until the system is proven leak-free. When they first turn on the new supply, they will perform a purge (flushing air out of the pipes) in a controlled manner to prevent the formation of a combustible gas-air mix. They will also check for adequate ventilation in areas with gas appliances – for example, ensuring boiler cupboards have required vents or that the room meets volume requirements for certain flueless appliances. During any soldering of pipes, they’ll take care to not start fires (using heat mats, etc.). If your installation involves working at height (like on a roof for a flue) or in a confined space (like a crawlspace), the engineer will take appropriate precautions per general safety regulations. As the homeowner, your role is to maintain a safe site too: keep children and pets away from the work area, and don’t obstruct the engineer with stored items where they need to work.
Homeowner Gas Safety: Once the system is up and running, you have ongoing safety responsibilities. Make sure you know the location of the emergency control valve and how to shut it off quickly in case you ever smell gas or suspect a leak. The universal gas emergency number in the UK is**…the Gas Emergency Freephone** (dial 0800 111 999) immediately. As a precaution, also open windows for ventilation, don’t switch any electrical devices on or off (to avoid sparks), and evacuate if necessary. Knowing these steps can save lives. Additionally, because carbon monoxide (CO) is a hidden danger with any combustion (including gas), always install CO alarms near gas appliances (as required by law for new installations) and test them regularly. Remember, CO is odorless and deadly – an alarm is the only warning you may get.
Finally, commit to regular maintenance: The HSE strongly advises that all gas appliances and flues be checked at least once a year by a Gas Safe registered engineer. This annual service will ensure your boiler, cooker, etc., continue to operate safely and efficiently. As a homeowner, you aren’t legally required to get annual checks (that’s only a legal duty for landlords), but it is highly recommended for safety. Many people schedule a boiler service every 12 months – this can prevent problems and give you peace of mind. Keep a record of each service. If any safety defects are ever found, do not use the appliance until fixed.
Certification, Inspection and Compliance Checks
When the installation is finished, you should receive certain certificates and records to document that the work complies with regulations:
- Gas Safe Installation Certificate: For most new gas appliance installations (boilers, etc.), the Gas Safe engineer will issue either a report or certificate detailing what was installed and that it was tested. If you had a new boiler installed, for example, the engineer will register it with Gas Safe who in turn notify the Local Authority. You (the homeowner) should then receive by post a Building Regulations Compliance Certificate confirming the installation (this typically arrives within a few weeks). This certificate is important for your home records – it shows that the installation meets building regs. If you don’t receive it in a month or so, follow up with your installer or Gas Safe. For other gas work (like installing new pipework or a cooker), the engineer should at least provide an invoice or report detailing the work and stating it was tested. There isn’t a formal certificate for purely pipework jobs, but you can ask for a Gas Safety Record. In any case, always retain any paperwork given.
- Commissioning Documentation: For appliances like boilers or fires, the installer will fill in a commissioning checklist (often found in the appliance manual). This ensures all tests (flue draught, burner pressure, etc.) were done and the appliance is safe. They should also explain thermostat controls, timer, etc., to you. If a manufacturer requires notification (for warranty), ensure that’s done.
- Local Authority and Final Inspections: Normally, if your gas work is done by a Gas Safe registered person, the Local Authority trusts the self-certification and won’t need to visit. However, if you went through building control (e.g., in the rare case of a DIY approach under supervision), a building inspector might come to check the installation’s compliance with Building Regulations. They would look at things like the flue placement, ventilation, and see the test results. Also, Gas Safe operates a quality control program: they may randomly inspect a sample of new installations done by their registered engineers. If your installation is selected, you’ll be contacted to arrange a free inspection by a Gas Safe officer. This is generally nothing to worry about if the work was done correctly. In fact, it’s an added layer of assurance. Should any defects be found, the engineer will be required to fix them and you’ll be informed. Gas Safe and HSE can enforce remedial action for non-compliance, so reputable engineers strive to do it right the first time.
- Warranty and Insurance: Check if your installer offers any warranty on their workmanship. Many gas installations come with manufacturer warranties (a boiler might have 5-10 years cover if serviced annually). Keep those details safe. Also inform your home insurance that you now have gas – some insurers want to know the type of heating in the house. As long as everything is installed to code, having gas heat shouldn’t increase premiums (it sometimes even lowers them compared to older electric or oil systems), but it’s good to update the info.
In summary, make sure all certificates and documents are in your hand or on file once the job is done. They are your evidence that the installation was lawful and safe. If you sell the house in the future, you’ll likely need to show the Building Regulations certificate for the new gas appliance (solicitors often ask for this). Not having it can cause complications, so don’t misplace it. If you do lose it, you can get a replacement from Gas Safe Register (they keep records); a fee may apply. The paperwork aspect may seem dull, but it’s an important part of the process to demonstrate compliance.
Tips for Ensuring Compliance and Choosing a Reputable Installer
Bringing a new fuel source into your home is a significant project – here are some final tips to ensure everything goes smoothly and safely:
- Hire the Right Professionals: Choose a Gas Safe registered installer with experience in new supply installations. You can find local registered engineers via the Gas Safe Register website. Don’t hesitate to ask for references or reviews – a reputable gas installer will have no problem with you speaking to past clients or checking their work record. Avoid anyone who suggests doing the job “off the books” or without permits – if they’re willing to cut corners on paper, they might cut corners on safety.
- Get Multiple Quotes: It’s wise to get at least 2-3 quotes for the internal installation work (and possibly for the whole connection if some firms handle liaison with the GDN). Ensure each quote is detailed: it should specify that they will follow Building Regulations and include testing and notification. Be cautious of quotes that are significantly lower than others – verify that those installers are planning to do all required tasks (e.g., will they install a CO alarm? will they include the building control notification fee? which might be hidden costs). Sometimes a slightly higher quote from a seasoned professional is worth it for peace of mind.
- Plan for Future Needs: When installing the gas pipework, consider any future gas appliances you might want. For example, if you only have a boiler now but might add a gas stove later, have the engineer size the pipes accordingly and perhaps stub a pipe near the kitchen for easy connection later. This avoids costly modifications down the line. Also, discuss the meter size with the GDN if you plan a high usage (most homes only need a standard domestic meter, but very large homes or mini blocks of flats might need a larger meter).
- Ensure Everything is Tested and Demonstrated: Before the engineer leaves, insist that they perform all the appropriate tests (you have a right to see the tightness test results if you wish) and that they demonstrate the system to you. A good installer will happily walk you through what was done, show you how to turn off the gas, light the boiler, reset controls, and so on. This handover is important for your confidence. It’s also a chance to spot if anything was missed. For instance, check that all gas appliances in the house (if any existing ones were tied in) still work properly after the new supply is commissioned – they should have checked, but an open conversation helps ensure nothing is overlooked.
- Maintain Safe Conditions Ongoing: After installation, maintain clear access to your gas meter and valves. Do not build over or cover the gas service route without proper advice (if you plan extension work, you might need to reroute the gas line). Install smoke alarms and keep a fire extinguisher or fire blanket handy in the kitchen, as general safety best-practice when using gas cooking or heating. Educate your family on the smell of gas (the “rotten egg” odorant) and what to do if they suspect a leak.
- Leverage Official Resources: The UK has excellent resources for gas safety. The Gas Safe Register offers consumer advice and can verify if an engineer or business is registered. The Health and Safety Executive (HSE) provides guidance and even a Gas Safety Advice Line. Your local council’s building control department can also answer questions about regulations and might provide guidance leaflets. Don’t hesitate to use these – it’s better to ask questions up front than to have issues later.
By following the above tips and the guidance in this article, you’ll be well on your way to a safe, legal, and efficient new gas supply in your home. Converting to gas can offer benefits like cheaper heating and instant hot water, but it comes with responsibilities that you now know how to manage. Always prioritize safety and compliance – they go hand in hand. With the right professionals on board and a clear understanding of the process, installing a new gas supply is very achievable. Soon enough, you’ll be enjoying the comforts of mains gas, confident that the system in place is sound and secure.
Sources:
- Citizens Advice – “Get your home connected to a gas or electricity supply” (on contacting your local gas network operator and distance considerations)
- National Gas (formerly National Grid) – Gas Service Laying Consent Guidance (on permissions for third-party land and listed buildings)
- HM Government – Building Regulations Approved Document J: Combustion Appliances and Fuel Storage (scope of Part J covering boilers, flues, CO safety)
- Registered Gas Engineer (Gas Safe official magazine) – “CO alarm rules for properties across the UK” (on new mandatory carbon monoxide alarm requirements effective Oct 2022)
- Health & Safety Executive (HSE) – Gas Safety (Installation and Use) Regulations 1998 – Regulation 9 Guidance (requiring emergency control valves on new gas supplies)
- HSE Gas Safety Advice – “Gas Safe Register – HSE” and HSE Leaflet INDG238 “Gas appliances – get them checked” (legal requirement for Gas Safe registered engineers and annual check advice)
- Cadent Gas Ltd – “New Gas Connection – Household Customers” (information needed to apply, responsibilities for meter and pipes)
- SGN & Wales & West Utilities – Excavation Guidelines (trench depth, width, and backfill requirements for gas service pipes)
- Gas Safe Register – “Building Regulations certificates” (notifying Local Authority and issuing compliance certificates for new gas appliance installations)
- Health & Safety Executive – “Gas Safe Register – What to check” (checking the Gas Safe ID card and engineer qualifications before work).
Contact us to realize your project.
