Necessary Documentation & Permissions
Before installing external wall or roof insulation in a house in England, homeowners must ensure they have the right approvals and paperwork in place. Planning permission is generally not required for external wall insulation in a single-family house if it does not significantly change the building’s appearance. This is considered “permitted development”, as long as the new finish is similar in appearance to the existing exterior. However, if the insulation or cladding will alter the look of the house (for example, changing from brick to a rendered finish), then full planning permission is needed. Always check with your local planning authority, especially if your home is in a conservation area or is a listed building – in such cases, stricter rules apply (e.g. listed buildings typically require Listed Building Consent for any exterior changes). If you want formal proof that your project doesn’t need planning permission, you can apply for a Lawful Development Certificate from the council. 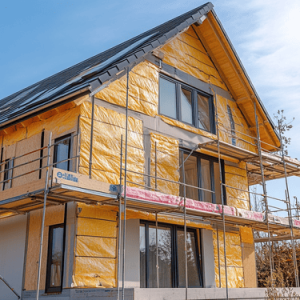
In addition to planning rules, Building Regulations approval is usually required for external insulation. Renovating more than ~25% of a wall or re-covering a roof triggers Part L of the Building Regulations, meaning you must upgrade that element’s insulation to meet current standards. For example, external walls being insulated must be improved to around a U-value of 0.30 W/m²K (a measure of thermal performance) or better (Part L Building Regulations U Values, 2023 Amendments), and roofs should aim for ~0.16–0.18 W/m²K (Part L Building Regulations U Values, 2023 Amendments). You (or your installer) should either submit a Building Notice or Full Plans to the local Building Control body before starting work.
An inspector may need to check that the insulation material, thickness, and fire safety measures comply with regulations. Other documentation to consider includes any Party Wall agreements (if the insulation will project onto or near a neighbour’s boundary) and an oversale licence if scaffolding or eaves will temporarily encroach on a neighbour’s land or the pavement. Keep all paperwork (permits, approvals, certificates) safely, as you may need to provide them when selling or remortgaging the home.
Permitted Insulation Materials in England
Homeowners can choose from several approved materials for external wall and roof insulation, each with different properties. Common options include expanded polystyrene (EPS), extruded polystyrene (XPS), polyisocyanurate (PIR) foam boards, phenolic foam (e.g. Kingspan Kooltherm), and mineral wool slabs (also known as stone wool or rock wool). All these materials can meet UK thermal requirements, but they differ in performance and suitability:
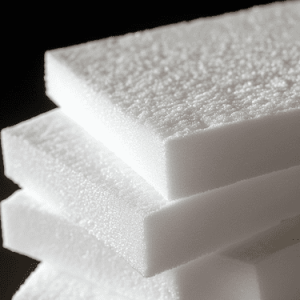
- Expanded Polystyrene (EPS) – A lightweight foam board made of bead polystyrene. It’s cost-effective and has decent thermal performance (typical lambda value ~0.032–0.038 W/m·K, meaning moderate thickness is needed). EPS is often used in external insulation systems and is somewhat “breathable,” allowing some moisture movement. Treated EPS boards are fire-retardant but still combustible; they are usually rated Euroclass E (will ignite but slow to spread flame). Building regulations do allow EPS on low-rise homes, but the system must include fire breaks and a non-combustible render or basecoat to protect it. Environmentally, EPS is derived from oil but can be recycled; it has a lower production cost (and carbon footprint) than mineral wool in many cases.
- Extruded Polystyrene (XPS) – A closed-cell rigid foam similar to EPS but denser and more water-resistant. XPS typically insulates slightly better than EPS (λ ~0.033 W/m·K) and has higher compressive strength, so it’s often used at the base of walls or for roof insulation.
 However, XPS is usually combustible as well (often rated Euroclass F unless additives are used). In practice, like EPS, it must be properly protected in any external wall system to meet fire and building standards. XPS is less vapor-permeable than EPS (more of a moisture barrier), which can be beneficial for damp-proofing but means ventilation must be considered in the design.
 - Polyisocyanurate (PIR) Foam Boards – A popular choice for high-performance insulation boards, usually faced with foil on both sides. PIR has an excellent thermal conductivity (often around 0.022–0.026 W/m·K in use), meaning you can use a thinner board to achieve the same insulation as thicker EPS or mineral wool. For example, ~60 mm of a PIR board can insulate as well as ~100–110 mm of standard mineral wool. PIR is rigid and lightweight, making it suitable for both walls and roofs (especially between rafters or above roof decks). Its fire rating is typically Euroclass B (some contribution to fire but self-extinguishing tendency). PIR will combust at high temperatures, but it forms a char layer which can slow fire spread.
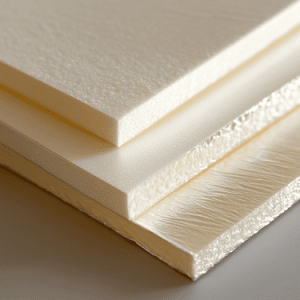 Newer PIR products often have additives to further improve fire performance. Always check that any PIR board used externally has proper certification (e.g. a BBA certificate) for use in a rendered cladding system, and note that high-rise buildings have stricter rules (non-combustible insulation only for residential buildings above 18 m, and new rules also affect those above 11 m).
 - Phenolic Foam – This is a type of closed-cell foam insulation like PIR, but made from phenolic resin. It offers slightly better thermal performance (λ as low as 0.020 W/m·K) and also attains a Euroclass B fire rating in many cases. Phenolic boards (e.g. Kingspan Kooltherm K5 for external walls) can achieve a given U-value with the least thickness of all common insulations.
 They are often used where space is at a premium. Fire-wise, phenolic insulation doesn’t melt and has a high limiting oxygen index (meaning it needs a high oxygen environment to sustain burning). It should still be encased behind non-combustible layers in external applications.
 - Mineral Wool (Rock Wool) – A wool-like insulating slab made from molten rock or slag, known for its non-combustibility. Mineral wool is rated Euroclass A1 (fully non-combustible, no contribution to fire), which makes it the safest choice in terms of fire – it will not burn or emit toxic smoke. It’s slightly less thermally efficient than PIR; typical thermal conductivity is around 0.035–0.040 W/m·K, so thicker insulation is needed (e.g. ~100 mm or more to meet wall targets). Mineral wool boards are breathable and also provide excellent sound insulation due to their dense, fibrous structure. They are often recommended for older solid-wall buildings that need to allow moisture to escape.
 Environmentally, while mineral wool comes from natural rock, its production is energy-intensive. Still, it’s durable and often made partly from recycled content. Many external wall insulation systems use mineral wool slabs especially for multi-storey or timber-framed buildings, sometimes in combination with other materials as fire breaks.
Other materials occasionally used include natural insulators (like wood fibre boards, cork, or sheep’s wool). These can be used externally if part of an approved system, though they are less common. Wood fibre, for instance, is quite breathable and eco-friendly but must be kept dry and usually requires a ventilated rain-screen cladding rather than a thin render coat. Always ensure whichever material you choose is certified for use in external insulation systems and check its fire rating and moisture properties. Updated government guidance after the Grenfell Tower fire emphasizes using non-combustible insulation for high-risk applications – while this primarily affects flats/blocks, it underscores the importance of fire-tested systems.
In summary, England’s regulations allow EPS/XPS and PIR on typical houses, but mineral wool or other A1/A2-rated insulation may be preferable, especially for taller buildings or to meet fire safety best practices. Discuss the options with your installer and consider thermal performance, fire safety, environmental impact, and cost to select the best material for your project.
Occupational Safety Requirements for Installation
Any external insulation work must comply with UK health and safety regulations, both for the workers on site and the household’s occupants. Professional installers will be familiar with these rules, but as a homeowner it’s good to know what to expect.
First, working at height is usually required (since insulation and rendering will take place up the walls, and possibly on the roof), so proper scaffolding is essential. Scaffolding should be erected and later dismantled by competent, trained personnel following the relevant safety standards. It must include guard rails at every platform level and toe boards to prevent tools or materials from falling. The scaffold will also need regular inspection (at least every 7 days and after any major weather event) by a qualified person to ensure it remains safe and stable. If scaffolding has to extend over a public pavement or road, the contractor should obtain a license from the local highway authority and may put up protective fans or seek a temporary footpath closure for public safety.
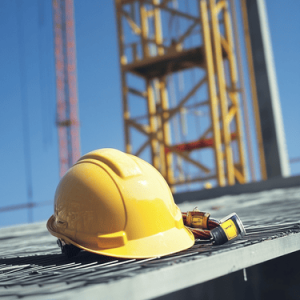
All workers on site should use appropriate Personal Protective Equipment (PPE). At minimum this means hard hats (head protection) and sturdy footwear with toe protection (What PPE Is Mandatory On A Construction Site). Installers will also typically wear high-visibility vests (so they are clearly seen), gloves when handling insulation materials or cement renders, and safety glasses when cutting insulation boards or mixing adhesives. If using power tools or cutting materials, dust masks (respirators) should be worn to avoid inhaling particles – for example, mineral wool fibers or polystyrene dust. For any roof insulation work, additional precautions are needed: roof ladders or harness systems must be used to prevent falls, and edge protection (guard rails at roof edges) should be in place if the work is on a pitched roof. The law requires that any work at height is planned and supervised to minimise risk, so a supervisor or site manager should be assessing risks like weather (high winds can be dangerous on scaffolds or when handling large insulation boards) and ensuring the site is kept tidy (to avoid trip hazards). 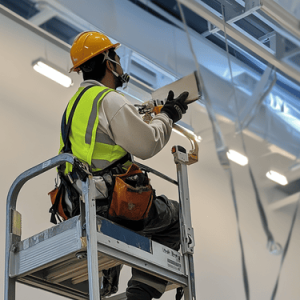
Beyond fall safety and PPE, there are other occupational safety considerations: manual handling of insulation boards (some can be large but lightweight; others like rendered boards can be heavy) should be done by enough people or with lift equipment to avoid injury. Mixing mortar or render often involves cement – workers should avoid skin contact (cement is caustic) by wearing gloves and long sleeves and use eye protection. The site may also generate noise (drills, mixers) so hearing protection is sometimes used.
As a homeowner, you should keep a safe distance during active work – for instance, if you need to exit the house, communicate with the contractors so you don’t walk under an area where work is happening overhead. Reputable installers will cordon off the work zone for everyone’s safety. All these measures should align with the UK Health and Safety Executive (HSE) construction guidelines, meaning the contractors should have a safety plan and appropriate insurance in place. Don’t hesitate to discuss any safety concerns with your installer – professional firms will be happy to explain how they protect their workers, you, and your property during the installation.
Technical Installation Steps for Engineers & Installers
Installing external insulation is a multi-step process that must be carried out by skilled installers (often a team including an EWI** (External Wall Insulation) system designer, engineers if needed, and trained renderers). Below are the typical steps they will follow: 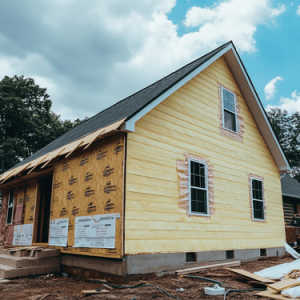
- Initial Assessment & Survey: The process begins with a thorough assessment of the property. The installers (or an engineer/assessor) will inspect the existing walls and roof for any issues like cracks, damp, or structural defects. It’s crucial to fix any underlying problems (e.g. rising damp or loose render) before insulating, otherwise those issues could be trapped or worsened by the new system.
- They will also take measurements and calculate the needed insulation thickness to meet Building Regulations – for example, determining that the walls need, say, 90 mm of insulation to reach a U-value of 0.30 W/m²K (Part L Building Regulations U Values (2023 Amendments)).
- During this planning stage, details are worked out for how to handle windows, doors, and eaves – insulation adds thickness to walls, so window reveals may need thinner boards and sills may need extending. Similarly, the roof soffits or verge might be adjusted so the new wall insulation tucks in neatly. If insulating the roof externally, the assessment covers the roof structure’s condition and how to integrate insulation above or below the roof covering.
- An important part of the assessment is checking fire safety provisions: for instance, installers may plan to include mineral wool fire breaks (strips of non-combustible insulation) at each floor level or around windows if using combustible insulation, in line with best practices. Ventilation is also considered – e.g. ensuring any air bricks, boiler flues, or vents are extended or upgraded so the house can “breathe” properly after the insulation is installed.
- Preparing the Surface: Before insulation boards can be attached, the exterior surfaces need preparation. This typically involves cleaning the walls (removing any dirt, algae, or flaking paint) and making the surface sound. Any protruding elements like pipes, gutters, or exterior lights are temporarily removed or refitted with extensions to accommodate the insulation thickness. If the house has an existing rendered finish that is loose or in poor condition, the installers may remove it or at least roughen it so that adhesives will bond well. They often install a starter track (usually an aluminium rail) along the bottom of the wall near the damp-proof course. This track is fixed with screws and provides a level support to start placing the insulation boards and also deflects water and pests from getting behind the insulation at the base.
- For roofs (particularly flat roofs), preparation includes stripping off old coverings if doing an external retrofit – for example, removing old felt and exposing the decking before adding insulation on top. On a pitched roof, tiles or slates may be removed if insulation boards will be added above the rafters (in a “warm roof” configuration). All such preparatory work is done in sections to avoid leaving the structure exposed to weather for long.
- Installing Insulation Panels: With prep done, the main insulation layer is applied. Boards or slabs of the chosen material (EPS, PIR, mineral wool, etc.) are fixed to the external walls using a combination of adhesive and mechanical fixings. For instance, if using EPS or PIR boards, the installer will trowel on a cement-based adhesive in dots or strips on the back of each board and press it onto the wall in a staggered brickwork pattern. Once a section of boards is in place and the adhesive has set, they drill through and hammer in special insulation anchors (plastic fixings with wide caps) to secure each board firmly – typically 6-8 fixings per standard board, more around edges. These anchors prevent any risk of boards bowing or falling off and ensure long-term stability.
- Mineral wool slabs are usually fixed with mechanical fixings that have plate washers, because they are semi-rigid and rely less on adhesive. The installers take care to stagger the joints of the boards, avoiding any continuous vertical or horizontal seams that could telegraph through the finish or allow drafts. All gaps or uneven areas are filled with foam or slivers of insulation to avoid thermal bridges. Corners and reveals are cut precisely, and corner beads or stop beads may be installed at building edges for reinforcement.
- If external roof insulation is being done, the process differs: on a flat roof, rigid boards (often PIR or XPS for their moisture resistance) are laid over the roof deck, sometimes in two layers with joints offset, then mechanically fixed or weighted down (as in an inverted roof design). On a pitched roof, insulation boards might be placed above the rafters (necessitating longer screws through counter-battens into the rafters) before re-installing the roof tiles. In all cases, it’s critical that the insulation layer is continuous and tight-fitting to maximize performance.
 Reinforcement and Rendering: After the insulation boards are in place, the next step is to apply a base coat and reinforcement mesh. The installers trowel on a base render coat – often a cementitious or polymer-modified mortar – across the entire surface of the insulation. While this base coat is wet, a fiberglass reinforcing mesh is embedded into it, covering all walls and wrapping around corners. The mesh overlaps at joints and is pressed in to eliminate wrinkles. This reinforcement is what gives the system tensile strength and crack resistance, preventing the finish from cracking along board lines. Extra strips of mesh (so-called “stress patches”) are usually added diagonally at the corners of window and door openings for additional strength (since those spots can be stress concentrations).
- Once the base coat cures, the external walls already have a protective layer. On top of this, a second, thinner coat is applied which could be the finish coat if it’s a thin render system. Finishing renders for EWI systems in England are typically either a thin-coat render (around 4–6 mm thick, often acrylic or silicone-based, available in many colours) or a traditional thicker render (~15 mm cement-sand) which might be painted afterwards. Thin-coat renders are popular because they are lightweight, flexible, and come pre-coloured – meaning no painting is needed and they can be formulated to resist algal growth and cracking. The installer will apply the finish render evenly and texture it (for example, a “scraped” or “dragged” finish) as per the homeowner’s choice.
- Other finish options include brick slips (thin brick facings that give a brick appearance) which would be adhesively applied on top of the base coat, or cladding materials. Meanwhile, if the roof was insulated, the finishing steps involve installing new roof membranes or re-tiling. For a flat roof, a weatherproof membrane (felt, EPDM, fibreglass, etc.) would be laid over the new insulation and sealed. For a pitched roof, new breathable underlay may be placed over insulation boards, then battens and the tiles re-fixed. Flashings and roof edges are adjusted to the new height of the roof.
- Post-Installation Wrap-Up: The final stage is all about finishing touches and inspection. Installers will refit any items removed earlier, such as downpipes, soil vent pipes, satellite dishes, or outdoor lights, often using longer screws or brackets now that the wall is thicker. New deeper window sills or extenders are fitted so they overhang the new insulated wall properly. They’ll also seal around openings with mastic to ensure no water can creep behind the insulation at joints. Once everything is done, a thorough inspection is carried out – either by the installation supervisor and/or the Building Control officer if it’s being signed off. They will check that the insulation system is continuous, well-finished and that there are no gaps at eaves or between wall and roof junctions, etc., where moisture or air could penetrate. The fire breaks (if any were required) might be checked for correct installation. The homeowner should be given documentation such as a guarantee certificate, product datasheets, and the Building Regulations completion certificate.
- Finally, the work area is cleaned up, scaffolding taken down (only after the render has cured sufficiently to not be damaged), and the exterior of the house will have a fresh new look. A good installer will walk the homeowner around to visually inspect and explain the key features of the new system. At this stage, it’s also wise to discuss maintenance (the installer can point out how to clean or care for the render) and ensure the homeowner is satisfied with the result before closing out the project.
Throughout these steps, following the manufacturer’s approved system guidelines is critical – external insulation is not a DIY job, and each product (anchors, mesh, render, etc.) works as part of a tested system. By adhering to these steps, professionals can ensure the insulated cladding is effective, long-lasting, and compliant with UK standards.
Advice for Homeowners During and After Installation
Having external insulation installed is a significant project, but proper planning and the right team will make it go smoothly. Here are some practical tips and considerations for homeowners:
- Choosing Qualified Contractors: Seek out installers who are experienced and ideally accredited for external wall insulation. In the UK, look for installers approved under schemes like PAS 2030/2035 (the standard for retrofit installers) or those who carry BBA certification for the systems they install (the British Board of Agreement certifies insulation systems and their approved installers). Don’t be afraid to ask for references or to see previous jobs – a reputable installer will have done many similar projects.
- It’s also worth checking if any government retrofit programs or grants are available; these often require using Trustmark-registered tradespeople. Compare quotes, but remember the cheapest quote is not always the best – make sure it covers all aspects (scaffolding, making good around windows, etc.) and that the company offers a warranty.
- Understanding Warranties and Guarantees: A professionally installed external insulation system should come with a substantial warranty. Many manufacturers provide a warranty on their insulation and render system (often 10+ years), and there are insurance-backed guarantee schemes that cover workmanship for 25 years in some cases.
- For example, under the Energy Company Obligation (ECO) or Green Deal schemes, a 25-year insurance-backed guarantee is standard. Even outside of those schemes, companies like SPS Envirowall offer around 10–15 year guarantees on their systems. Make sure you receive the guarantee documents on completion – this protects you if issues arise later and can be important for future buyers of your home. Also confirm that the materials used are certified (ask for the BBA certificate number or equivalent for the system) as this is a sign of quality and compliance.
- Minimising Disruption: External insulation work is generally less disruptive than internal renovations – most of the work happens outside your home. That said, expect some noise from drilling and hammering, especially when fixings are being installed or when old render is being knocked off. Vibration from drilling can be felt inside, but it’s usually short-lived. You can continue living in the house throughout the process. It’s wise to remove pictures or ornaments from walls if you have old plaster, just in case the vibrations cause them to fall. Protect or relocate any plants, patio furniture, or fragile items near the walls, as the contractors will need space around the perimeter of the house. Communicate with the installers about access – for instance, if you have side passages that need to be kept clear for you to come and go.
- Generally, scaffold will wrap the house and may block some windows temporarily; let the contractors know if you have any concerns (e.g., ensuring a clear exit route in case of emergency). If roof insulation is being done and the roof is opened, the contractors will plan this when weather is dry, but it might be a good idea to be prepared for a day or two of workers needing to access the loft or interior in case of any adjustments.
- Living in the Home During Works: Safety and comfort are priorities. Keep children and pets away from the work areas – this might mean setting up a safe indoor play area or using the back door instead of front (or vice versa) depending on which side of the house is being worked on. Expect the property to look a bit untidy during works (with materials on site, and scaffold netting, etc.). Most installs take a few weeks (perhaps 2–4 weeks for an average house’s walls; longer if the roof is included or if weather delays occur).
- Discuss with your installer about any specific needs – for example, if you work from home, they can try to schedule the loudest tasks at certain times. Dust is usually minimal outside, but you might want to keep windows closed when sanding or cutting is happening on that elevation. After each day, workers usually tidy up, but you can also request a weekly check-in to address any concerns. Remember that once the insulation is on and the rendering begins, the exterior will start to look much better – the final stretch can require patience as the render dries and scaffold is taken down.
- Aftercare and Maintenance: Once your external insulation system is in place, it generally needs very little maintenance. The new render is weather-proof and should protect the underlying wall from rain and frost. It’s a good idea to inspect your walls annually – check for any cracks in the render or sealant, especially around windows and doors. Hairline cracks can occasionally appear (due to building movement or shrinkage) but if the system was installed well with mesh, these should be rare and minor.
- If you do see any cracks, notify your installer (if under warranty) or a professional to seal them, to keep water out. The finish may gradually accumulate dirt or algae, especially on shaded or north-facing walls – most modern finishes are algae-resistant, but if you notice discoloration you can gently wash the walls with a hose or a brush with mild soapy water. Avoid using high-pressure washers, as they can damage the render.
- In terms of living with your newly insulated home, you should notice improved comfort – warmer in winter, cooler in summer, and possibly reduced noise if you used dense insulation like mineral wool. Make sure your home’s ventilation is adequate; insulation will make the house more airtight, so use extractor fans or trickle vents to avoid condensation (the dew point has been moved outward, which is good, but you still need to ventilate kitchens/bathrooms as usual). If any issues arise – say a section of render gets damaged by an impact – address it promptly to maintain the integrity of the system.
- Energy Savings and Other Benefits: After installation, monitor your energy bills and comfort levels. External insulation can significantly cut heat loss through walls (which normally account for a large percentage of heat loss in uninsulated homes), so you should see lower heating needs and costs. You might find that internal walls are less cold to the touch and drafts are reduced. Many homeowners also enjoy a refreshed exterior appearance – the house gets a “facelift” along with the insulation. Be sure to inform your home insurer that you’ve upgraded the insulation, as this may be considered an improvement (it typically doesn’t raise premiums and in some cases could slightly reduce them due to improved building protection).
- Finally, keep all documentation of the install (invoices, permits, certificates, the EWI system guarantee) in a safe place. This will be useful for future reference and will be a selling point if you ever move, as buyers can see the home has an accredited insulation system with paperwork. With proper care, external insulation can last for decades – studies have shown that well-installed systems have durability comparable to traditional walls. Enjoy the benefits of a more energy-efficient and comfortable home!
Sources:
- Planning Portal – External Walls: Guidance on Planning Permission and Building Regulations
- UK Permitted Development Rights – Technical Guidance (Ministry of Housing)
- Building Regulations Approved Document L & Refurbishment Standards – U-value requirements (Part L Building Regulations U Values (2023 Amendments))
- EWI Store – Fire Resistance of Insulation Materials (Rockwool vs Phenolic)
- Rockwool UK – Stone Wool Insulation Benefits (Thermal, Fire, Acoustic)
- Insulation UK (Blog) – Thermal Conductivity of PIR vs XPS
- YES Energy Solutions – External Wall Insulation FAQs (Warranties & Breathability)
- Health and Safety Executive (HSE) – Construction Site Safety (Scaffolding & Work at Height)
Contact us to realize your project.